While powering on the laptops, rapidly hit F9 to display the list of boot devices.
Select your Samsung USB stick from the menu.
Task 1: Familiarize Yourself with the Ubuntu Desktop
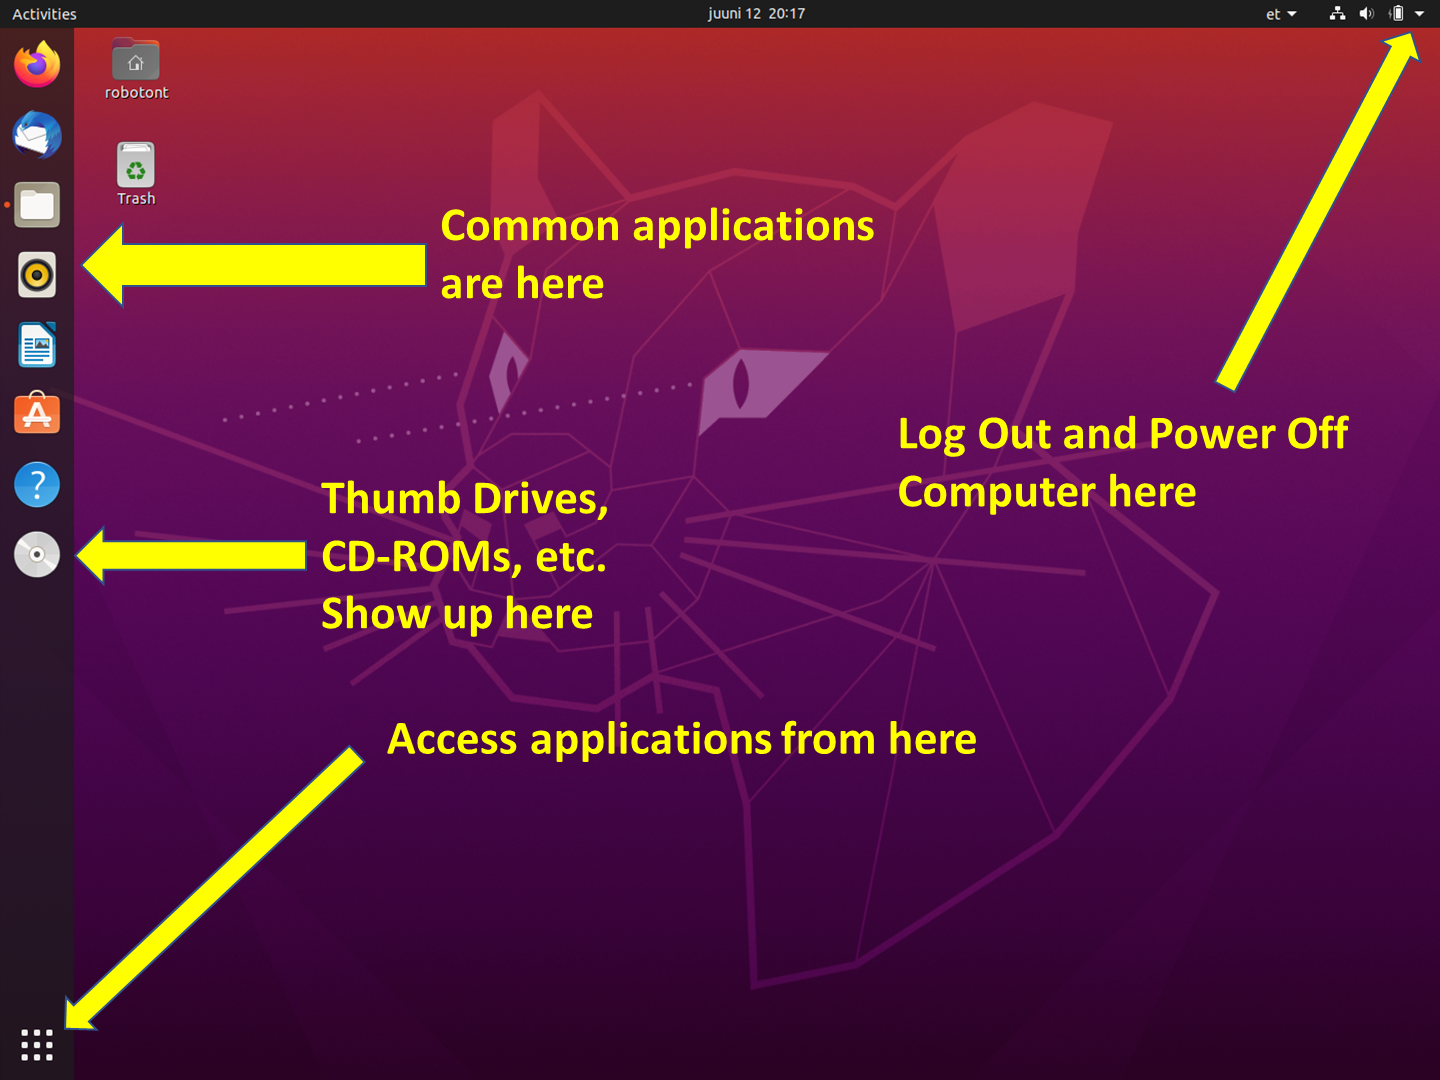
At the log-in screen, click in the password input box, enter t0ndik00bas for the password, and hit enter. The screen should look like the image below when you log in:
Ubuntu statusbar is located on the top right of the screen.
Statusbar contains indicators which allow you to monitor the state of the system and applications. For laptops, you will see a battery level indicator.
It also provides easy access to system controls, such as, sound level or wireless networks.
The rightmost arrow icon brings up a menu which allows the user to log out, shut down the computer, access system settings, etc…
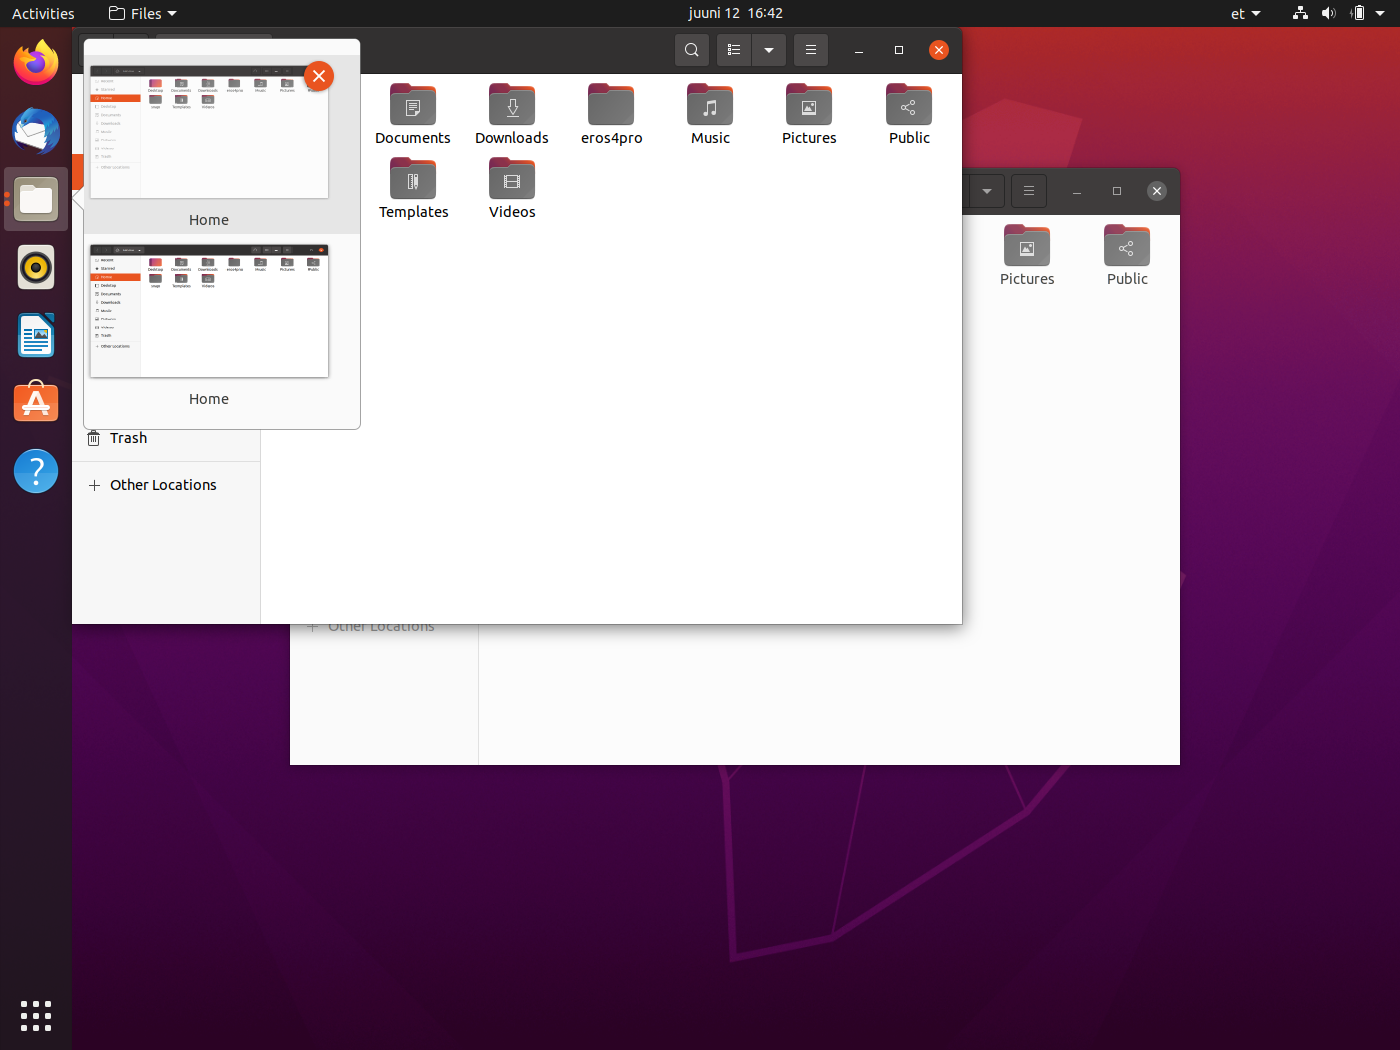
Click on the folder icon on the launcher. A window should show up, and your desktop should look like something below:
Things to notice:
The menu for windows are found on the menu bar at the top of the screen, much in the same way Macs do. The menus, however, only show up when you hover the mouse over the menu bar.
Notice that there are dots on the left side of the folder icon. The dots on the left show how many windows of this application are open, and the gray area around the icon shows which application is currently in the foreground, or “has focus”. Clicking on these icons when the applications are open does one of two things:
If there is only one window open, this window gets focus.
If more than one are open, clicking a second time causes all of the windows to show up in smaller views, so that you can choose which window to go to (see below):
Task 3: Start an Application & Pin it to the Launcher Bar
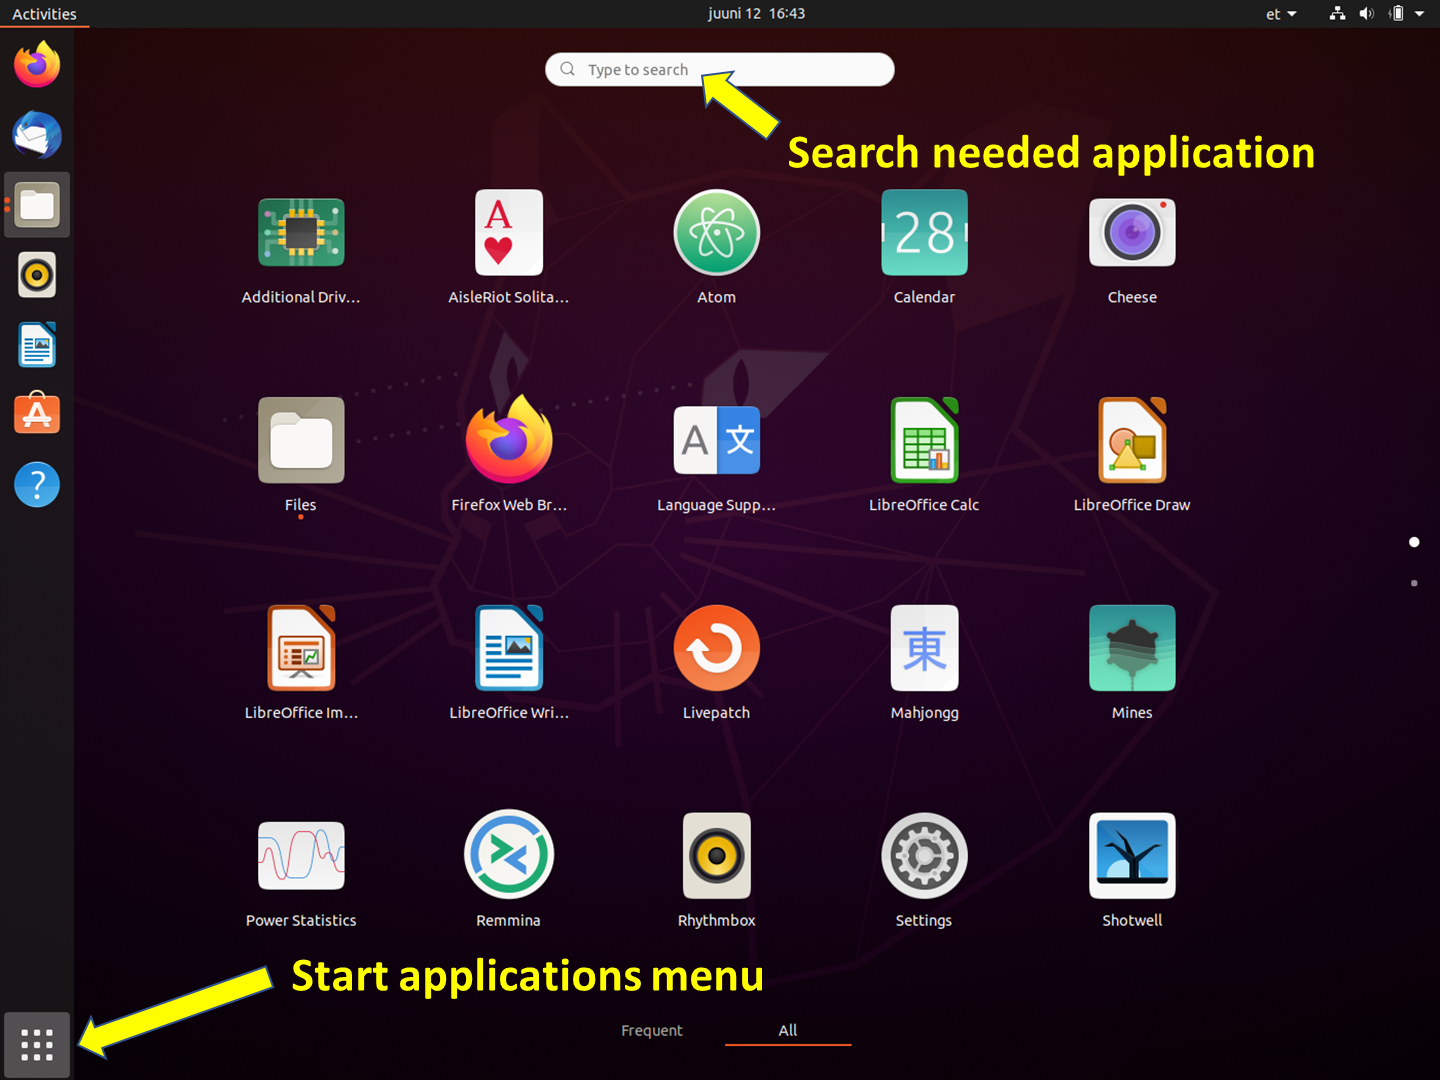
Click on the launcher button (bottom left) and type gedit in the search box. The “Text Editor” application (this is actually gedit) should show up (see below):
Click on the application. The text editor window should show up on the screen, and the text editor icon should show up on the launcher bar on the left-hand side (see below):
Right-click on the text editor launch icon, and select “Add to Favorites”.
Close the gedit window. The launcher icon should remain after the window closes.
Click on the gedit launcher icon. You should see a new gedit window appear.
The gedit application can now be opened quickly by a single click.