Mapping and navigation in simulated environment
In this workshop, we aim to demonstrate some advanced robotics capabilities of ROS and its Navigation. In order to prevent unwanted damage to the robot or it’s surroundings, we first use a Robotont in a simulated world. After everything looks good in the simulation, we try the same on a real hardware.
Setting up ROS Navigation and Robotont in Gazebo simulation
This workshop relies on several ROS packages, which should already be preinstalled on your portable USB drive. Nevertheless, it does not hurt to enter the apt command again to update the dependencies. The apt commands to install Navigation and some other relevant packages using apt is as follows:
sudo apt update
sudo apt install ros-noetic-navigation ros-noetic-move-base ros-noetic-teb-local-planner ros-noetic-amcl ros-noetic-map-server ros-noetic-gmapping ros-noetic-realsense2-description
Additionally, we need the following packages to exist in our catkin workspace:
robotont_nuc_description
robotont_navigation
robotont_demos
robotont_gazebo
In case you have messed up your workspace, here is a copy-paste 4-liner for you:
cd ~/catkin_ws
vcs import --input https://raw.githubusercontent.com/robotont/robotont-setup/noetic-devel/ansible/roles/catkin/files_for_laptops/.rosinstall src
catkin build
source devel/setup.bash
Next let’s bring up a Gazebo simulation environment with the Robotont. There are different Robotont configurations available but in this workshop, we are going to use two different configurations: robotont_gazebo_nuc and robotont_gazebo_lidar.
Let’s launch the first configuration, robotont_gazebo_nuc, in a pre-made simulated world that represents a simple maze. Enter the following roslaunch command:
roslaunch robotont_gazebo world_minimaze.launch
Note
Gazebo may update its model database when it is started for the first time. This may take a few minutes.
After a successful launch, the window that pops open should look similar to the Fig. 4 below.
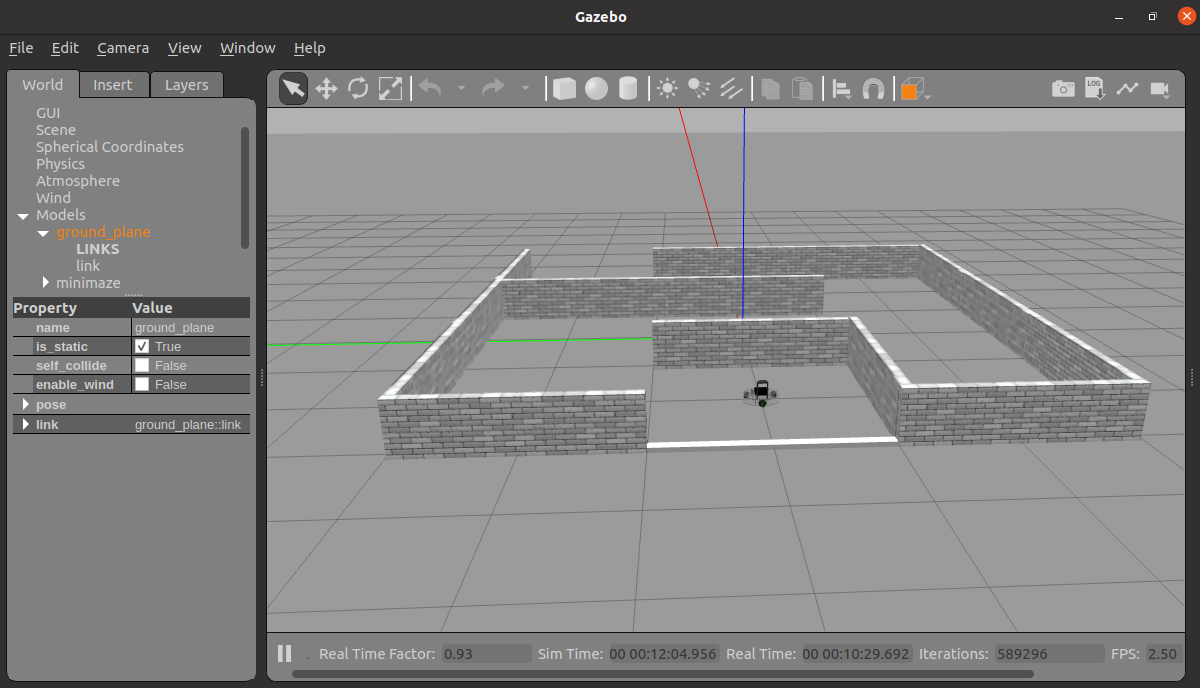
Fig. 4 Gazebo window with walls to make up a maze and a Robotont model.
Teleoperating the robot in Gazebo and visualization in RViz
Now, let’s explore the Gazebo world and see how ROS handles simulated worlds. We can use keyboard-based teleoperation for moving the Robotont. Open a new terminal window and enter:
rosrun teleop_twist_keyboard teleop_twist_keyboard.py
Recall the Day 1 and Day 2 for the keyboard controls and drive the robot through the maze.
Robots use cameras and laser sensors to perceive their immediate surroundings. As we already know, In ROS we can use RViz to visualize various sensory information. So start up RViz and add the following Display types:
RobotModel
DepthCloud
Image
After the Displays are properly configured, the view in RViz should look similar to Fig. 5. Go ahead and save the RViz configuration for future use (File->*Save*).
Try to navigate the maze by only looking at the RViz (not the Gazebo) window. When done, shut down all the nodes.
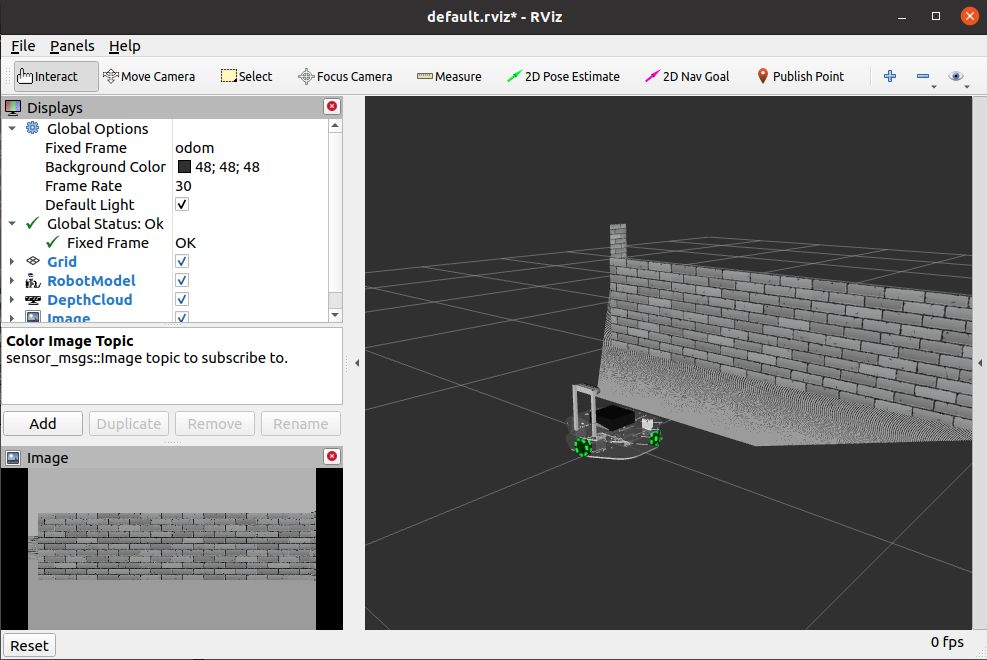
Fig. 5 Visualizing Robotont and its sensor feeds in RViz
Creating a 2D map of an environment
Now we are ready to test out mapping and navigating a known map.
Launch the Gazebo world-file in order to simulate the Robotont in the environment. However, this time, let’s use a Robotont with a 2D lidar as it will has wider field of view than that of our 3D camera. This helps the mapping and localization algorithms to create a maps and localize with higher accuracy for now.
roslaunch robotont_gazebo world_minimaze.launch model:=robotont_gazebo_lidarIn the RViz configuration, we can disable (uncheck) the Image and DepthCloud as this Robotont configuration does not contain the depth camera. However, let’s add and configure LaserScan to visualize the data from the 2D lidar.
#. Launch the SLAM in order to map the environment using gmapping algorithm: .
roslaunch robotont_demos gmapping.launch
Now it’s time to add Map display plugin with topic:
/mapto our RViz Displays and change the Global Options > Fixed Frame tomap.You should see a fragment of a map which is generated based on the current field of view of the robot. Use the keyboard-based teleoperation to drive through the entire maze to develop a full map similar to Fig. 6.
When the map appears sufficiently complete, run the map_saver node to save your map using the following command (it will save the map in your working directory under the name mymap):
rosrun map_server map_saver -f mymap
After saving the map, shut down all the nodes.
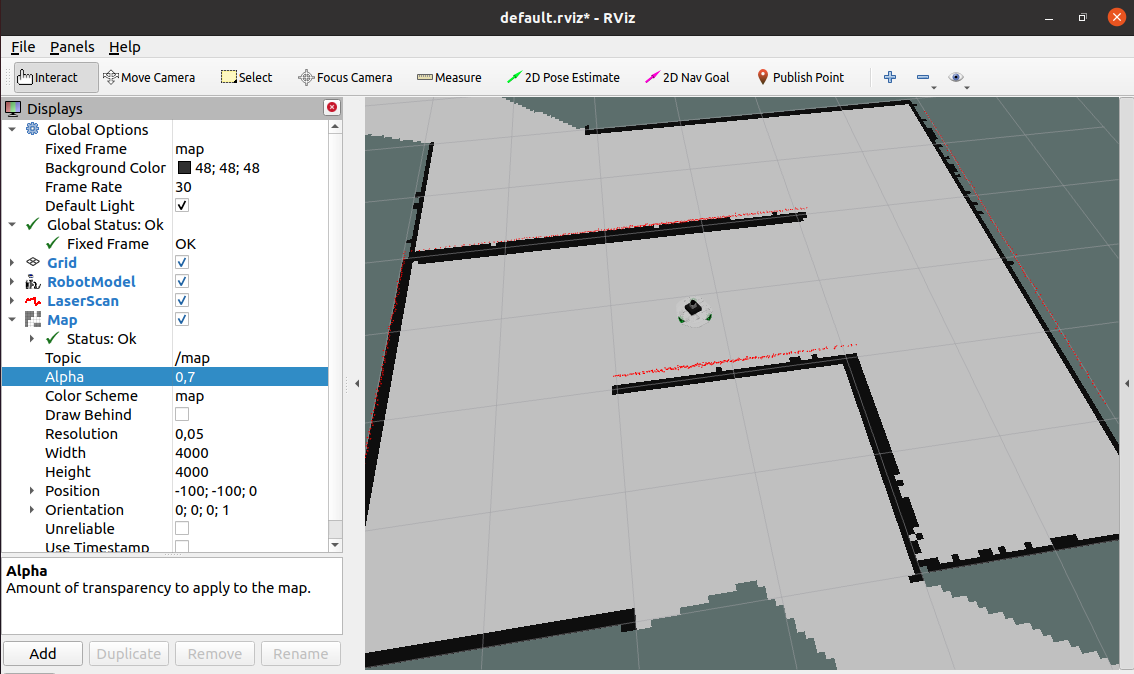
Fig. 6 Mapping with Robotont